SIDO Råmåttsmätning/en: Skillnad mellan sidversioner
Hoppa till navigering
Hoppa till sök
Erik (diskussion | bidrag) Skapade sidan med '= Installation of MarCom = # Goto '''https://dam.mahr.com'''<br />' |
Erik (diskussion | bidrag) Skapade sidan med '= Installation of MarCom = # Goto '''https://dam.mahr.com'''<br />Fil:Mahr1.png # PIN-Code: '''L6L26''' # Click '''”PIN-Download”''' followed by '''”Download”''' o...' |
||
| Rad 1: | Rad 1: | ||
Instructions for installing the caliper from Mahr and SIDO board measurement service. | Instructions for installing the caliper from Mahr and SIDO board measurement service. | ||
= Installation of MarCom = | |||
# Goto '''https://dam.mahr.com'''<br />[[Fil:Mahr1.png]] | |||
= Installation of MarCom = | = Installation of MarCom = | ||
# Goto '''https://dam.mahr.com'''<br />[[Fil:Mahr1.png]] | # Goto '''https://dam.mahr.com'''<br />[[Fil:Mahr1.png]] | ||
# PIN-Code: '''L6L26''' | # PIN-Code: '''L6L26''' | ||
# | # Click '''”PIN-Download”''' followed by '''”Download”''' on next page. | ||
# | # Download will start. The installation file is rather big, almost 100 Mb. | ||
# | # When the download is complete, go to the directory where the file was saved and unpack the file '''”MarConnect--MarCom_Standard--MarCom_5.1-2--SW—Standard.zip”'''. | ||
# | # Execute '''”S e t u p-MarCom.exe”'''. | ||
# | # Follow all instructions and install all necessary drivers. | ||
# MarCom | # The MarCom program starts automatically when the installation is complete. If it is not started, click on the MarCom icon on the desktop. | ||
# | # Double click on the text '''”Double Click Here”'''<br />[[Fil:Mahr2.png]] | ||
# Anslut USB-stickan till datorn. | # Anslut USB-stickan till datorn. | ||
# Lägg till mätinstrument - '''”i-Stick”'''.<br />[[Fil:Mahr3.png]] | # Lägg till mätinstrument - '''”i-Stick”'''.<br />[[Fil:Mahr3.png]] | ||
Versionen från 25 november 2016 kl. 12.27
Instructions for installing the caliper from Mahr and SIDO board measurement service.
Installation of MarCom
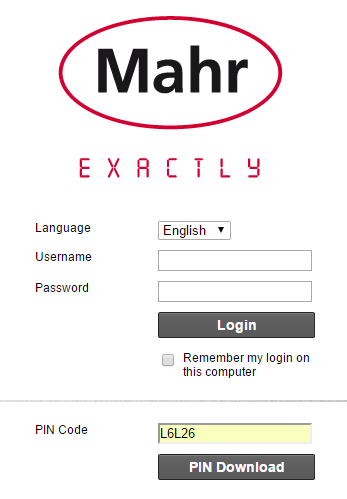
- Goto https://dam.mahr.com

Installation of MarCom
- Goto https://dam.mahr.com

- PIN-Code: L6L26
- Click ”PIN-Download” followed by ”Download” on next page.
- Download will start. The installation file is rather big, almost 100 Mb.
- When the download is complete, go to the directory where the file was saved and unpack the file ”MarConnect--MarCom_Standard--MarCom_5.1-2--SW—Standard.zip”.
- Execute ”S e t u p-MarCom.exe”.
- Follow all instructions and install all necessary drivers.
- The MarCom program starts automatically when the installation is complete. If it is not started, click on the MarCom icon on the desktop.
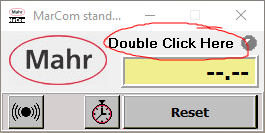
- Double click on the text ”Double Click Here”

- Anslut USB-stickan till datorn.
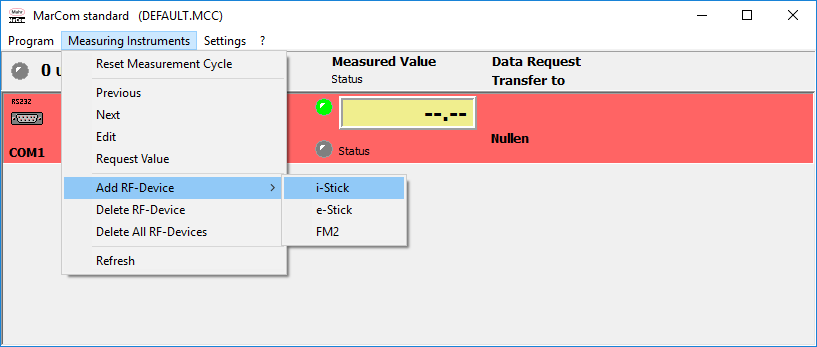
- Lägg till mätinstrument - ”i-Stick”.

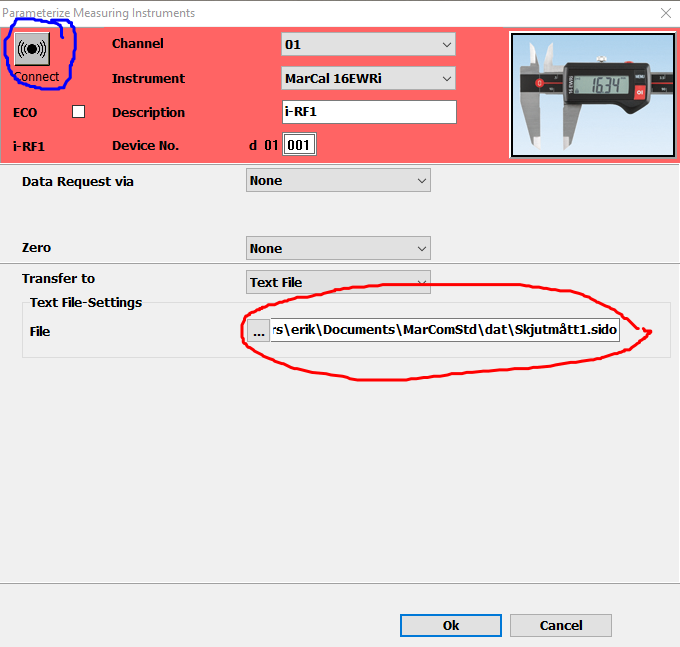
- Välj instrument ”MarCal 16EWRi” och ”Transfer to -> Text File”
Välj var du vill spara text-filen.
Namnet på filen blir det namn som mätaren kommer att få i SIDO.
VIKTIGT! Filändelsen måste vara .sido
- Anslut till mätaren genom att klicka på Connect-ikonen i samma fönster (blå markering), inte från ”startfönstret”. Klicka Ok och stäng fönstret.
- När skjutmåttet är anslutet ändras ”connect-ikonen” till grön och man kommer att se mätvärdena på displayen.
Installation av SIDO Board Measurement
- Kör filen ”SIDOBoardMeasurement.msi”
- Följ instruktionerna och installera programmet.
- I windows startmeny, leta reda på programmet ”SIDO Board Measurement”. Högerklicka på det och välj ”Kör som administratör”.
- Ange sökvägen till KATALOGEN där .sido filen lagras (punkt 12 under MarCom installationen).
- Ange den URL som du fått av oss i det andra fältet.

- Klicka på Starta service.
- Programmet installeras som en tjänst i Windows.
- Öppna ”Tjänster” i Windows och kontrollera att tjänsten körs.

- Gör en mätning med värdet 0.0
Om skjutmåttet inte redan är en registrerad mätare i SIDO kommer den att skapas och blir då synlig dels på administrationssidan i SIDO och valbar i råmåttsuppdrag på uppdragsskärmen. - Skjutmåttet går nu att använda vid råmåttsmätningar.